Welcome to the Peapod Photography Blog! Here you can find articles about some of the dishes I have created, behind the scenes stories from photoshoots, and tips and tricks for food photography.
- Composition Basics and Tips for Food Photographyby peapodphoto
Food photography has evolved into an art form over the years, with countless images enticing our taste buds on social media and in cookbooks. Behind every visually stunning food photograph lies the skillful composition and styling that enhances the appeal of the dish. In this blog post, we will delve into the fundamental principles of composing food photographs, exploring three popular types of shots: the 90-degree overhead flat lay, the 0-degree vertical composition, and the 45-degree single dish shot. Keep reading to discover tips on composition, color theory, and more to elevate your food photography game.
Basic Composition Principles
Before diving into specific shot types, it is essential to grasp a few fundamental principles of composition that can be applied to any food photograph:
a. Rule of Thirds: Dividing the image into an imaginary grid, position key elements, such as the main dish or focal point, along these lines or at their intersections. This creates balance and visual interest.
b. Leading Lines: Utilize lines within the composition, such as a cutting board’s edge or a table runner, to direct the viewer’s eye towards the food.
c. Symmetry and Balance: Experiment with symmetrical arrangements to create a sense of harmony. Alternatively, utilize asymmetry to add visual tension and intrigue.
d. Negative Space: Leaving areas of the frame empty around the main subject highlights the food and adds a touch of elegance and simplicity to the composition.
e. Odd Numbers: This sounds like an odd tip for composition but it can be the most important. Using an odd number of items in your composition can create visual interest by leaving the eye searching for the missing piece. There is something about our brains that make us want to see things in even numbers. When we deliberately take away that symmetry our brain locks onto the odd number of objects and searches for the missing piece. This creates visual interest and an appealing look to your photos.
Types of Shots
90-Degree Overhead Flat Lay Shots:
The 90-degree overhead flat lay shot gives a bird’s eye view of the food, showcasing a beautifully styled arrangement of ingredients and props spread out on a table. This composition style is particularly popular on social media platforms like Instagram and for editorial features. To make the most of this shot, consider the following:
a.Composing the Shot: Place the hero of the shot first and compose around your dish. Use grouping to show the relationship between items. One trick I love for composing the flatlay is to think of your image as a large “C”. Place your hero on the curve and continue the pattern with your props and watch as your eye is naturally drawn to your subject. Another pro tip here is to add risers underneath plates to create depth in your composition when it feels too flat.
b. Lighting Technique: Soft, natural light works best for this style. Place your table near a window and experiment with different times of the day to capture the ideal lighting conditions. Diffuse harsh sunlight using sheer curtains and use a reflector to fill in shadows, ensuring the food appears appealing and well-illuminated. If natural light is not an option, use a large softbox to diffuse the light. Shadows can add interest and emotion into your shots. Consider strategically placing objects to create a long shadow in your negative space.
c. Props: Use a variety of different props related to the dish to add interest to the composition. Incorporate utensils, cutting boards, colorful napkins, or fresh herbs to complement the dish and enhance the overall aesthetic.
d. Color Theory: Select props that harmonize with the colors of the dish itself. Consider complementary colors (opposite on the color wheel) to create a visually striking and balanced composition. For example, place a vibrant blueberry crepe on a yellow plate to create a captivating contrast.
0-Degree Horizontal Composition
The 0-degree horizontal composition presents the food from eye level, immersing the viewer in the experience of the dish. This style is commonly used for drinks, baked goods, sandwiches, and other layered items. This view highlights the height in these dishes beautifully. To create captivating vertical compositions:
a. Composing the Shot: Place your hero in the center of the frame. Place smaller objects in the foreground and larger objects in the background. One easy tip for this type of shot is to utilize the rule of thirds and create a triangle composition. To achieve this, layer the height of your objects with a taller object in a back corner, the hero in the middle, and a smaller object in the front opposite corner. This will frame the main dish nicely and draw your attention to the main subject.
b. Lighting Technique: Backlighting is great for these scenes. It adds a beautiful softness to the image and really highlights this composition nicely. Utilize diffused natural light through sheer curtains or white diffusers. Use a white foam board as a reflector to fill in any shadows and reduce harsh contrasts, ensuring the front of the food is well lit.
c. Props: Select props judiciously, focusing on items that complement the composition and accentuate the theme of the dish. Experiment with elegant cutlery, patterned tablecloths, or rustic wooden elements to create visual interest.
d. Color Theory: For vertical compositions, keep the color palette more cohesive and complementary. Choose prop colors that accentuate the dish’s natural hues and help tell a cohesive story. Harmonious colors enhance the overall appeal and draw the viewer’s attention.
4. 45-Degree Single Dish Shots:
The 45-degree single dish shot adds depth to the composition by providing a slightly diagonal perspective of the dish, capturing both the plate and some of the surrounding elements. This style is often employed in restaurant menus because it is considered the “natural” way we view food when sitting at a table. When working with this angle:
a. Composing the Shot: Simplicity is best here. We are highlighting a single dish so the plate should take up most of your frame. Props should be limited to keep our focus on the dish. There are still many ways to make this shot interesting. Use the rule of thirds to place it slightly off center and draw our eye away from the negative space. Another technique is to shoot slightly from the side to increase visual interest.
b. Lighting Technique: Opt for soft, diffused lighting to avoid harsh shadows and highlights. Position the light source at a slight angle to create soft highlights and gentle shadows, enhancing the texture and form of the dish.
c. Props: Keep the focus on the main dish while using carefully selected supporting elements to accentuate flavors or give context. A sprig of fresh herbs, a splash of sauce, or a scatter of breadcrumbs can add interest and depth to the shot without overwhelming the subject.
d. Color Theory: When composing a 45-degree shot, emphasize color harmonies by incorporating props that complement the dish’s hues. Consider analogous colors (next to each other on the color wheel) to maintain a cohesive and visually pleasant palette. The key with this shot is to accentuate the dish and keep our eyes on the food.
Creating stunning food photography can be simple if we use some basic principles of composition. By employing these techniques, understanding lighting, and incorporating thoughtful prop selection and color theory, you can elevate your food photography to new heights. Whether you’re experimenting with new styles or sharpening your skills, remember that practice and repetition is key. Draw inspiration from your favorite food magazines and creators and develop your unique style. So, grab your camera, assemble your gear, and embark on the journey of composing mouthwatering food photography.
- Pasta Night, Elevatedby peapodphoto
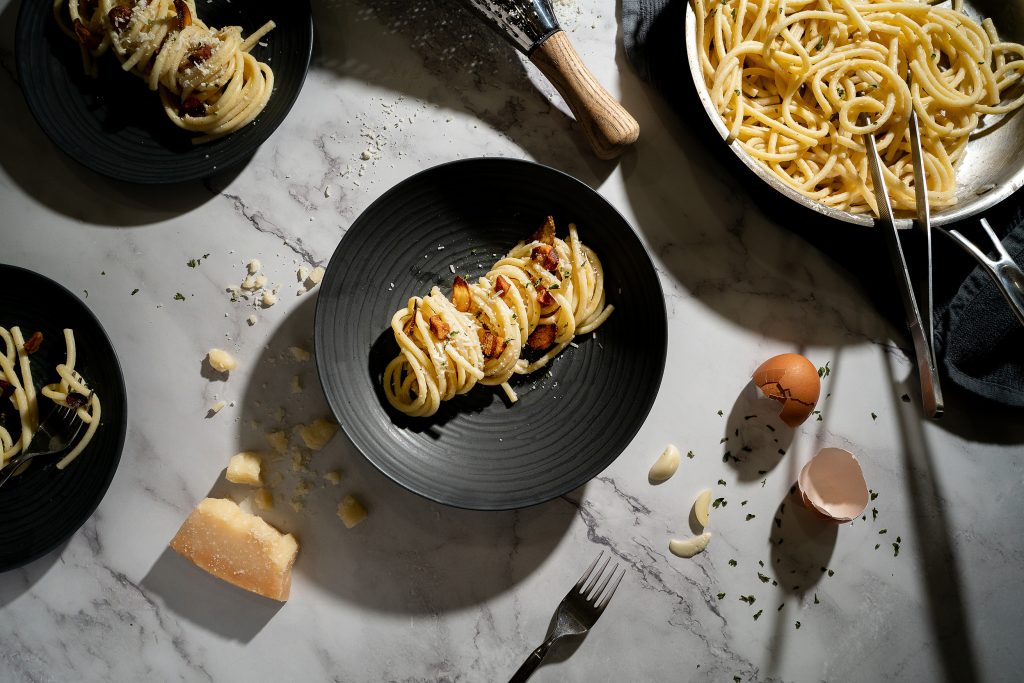
Carbonara is one of those dishes that has the ability to captivate the hearts and palates of all those that taste it. With its rich sauce and creamy texture, the carbonara is a cherished culinary creation steeped in tradition. This version uses a hearty bucatini pasta with a delightful touch of crispy garlic that adds an extra layer of texture and delicious flavor. The savory allure of this classic pasta dish makes it perfect for an intimate evening for two.
Like many of our favorite dishes, the exact origins of carbonara are subject to debate. The widely accepted theory is that the carbonara emerged in the Lazio region of Italy during the mid-20th century. The dish was created as a hearty and nourishing dish for the coal miners of the area after a hard day of working. Using humble ingredients that were readily available like egg, guanciale (cured pork jowl), pecorino romano, and black pepper, this preparation quickly took off because of its simple yet incredibly delicious sauce. Because of these origins, the name “carbonara” is thought to come from the Italian word “carbone” which means coal.
In Italy pasta is much more than just a food. The origins can be traced over 2,000 years to Ancient Rome and the Etruscan civilization where pasta was made by hand and dried for preservation. As the generations passed, the different regions of Italy each developed their own special shapes that were made to highlight their unique regional tastes.

To honor the authentic roots of carbonara, this dish uses bucatini pasta. I find this shape of pasta to be ideal for the carbonara which should come as no surprise since this pasta shape also originated in the Lazio region of Italy, more specifically in Rome. This traditional Italian pasta is long and hollow, resembling a thick spaghetti with a hole running through the center.
This unique shape captures the sauce within the pasta making each bite a harmonious blend of flavor and texture. Bucatini is best prepared “al dente,” which literally means to the teeth, but what it means for this shape is that it should be flexible and easy to twirl but still have a bite to it. Make sure to save some of the pasta water to make your sauce; the starchy and salty water acts as an emulsifier, a thickener, and adds a bit of seasoning as well.
Traditionally carbonara is made with guanciale, which is pork jowl that is coated in herbs and cured. This process gives it an incredible aromatic flavor in addition to the salty deliciousness from the cured pork. One way to think of it is kind of like a fancy bacon, though that does not really give guanciale its due praise. This deliciously crispy bite adds a burst of flavor to the final dish. When making your carbonara, make sure to remove the guanciale once it is nice and crispy and add it back to the final dish before serving to make sure it doesn’t get soggy and keeps its bite.
What really sets the carbonara apart is the delicious velvety texture of the sauce. Like many foreign dishes that have been through the American wringer, you can find carbonaras on the menu throughout the country that feature a bechamel based cream sauce with romano cheese and bacon. Now, while that does sound delicious in its own right, a true carbonara has no cream and is a much more delicate process than throwing sauce on pasta. Carbonara refers to the method of preparation as much as the sauce that coats the pasta, and egg is an integral part of that process. Egg yolk is mixed with pecorino romano cheese and black pepper.
What I like to do next is to temper this mixture with the pasta water so that I don’t get any scrambled eggs once it hits the hot pasta. Slowly mix in your pasta water to the eggs and cheese. Then the hot pasta goes into a clean pan with a little bit of pasta water and slowly the mixture is added. The residual heat cooks the sauce and as you stir around your pan the sauce comes together to form the rich carbonara. Add the guanciale and continue to stir the pasta until every strand is coated in the delicious sauce.
To elevate the flavors even further and add a little bit of texture, consider adding some toasted garlic chips for a nice finishing touch. Thinly sliced garlic fried to a golden crisp add a delightful crunch and burst of intense flavor to the already flavor-packed dish. Scatter these crispy garlic chips over the top of the carbonara before serving and enjoy as they make themselves at home in the creamy pasta for an unforgettable bite.

This classic Italian dish, rich with history and impressive flavors, is a perfect choice for an intimate evening. The quick preparation and simple ingredients means you can spend time enjoying the night (This also takes away the pressure of ruining an expensive piece of meat in the oven as the time slips away!). It is also a great dish to cook with a partner as the simple steps can be divided at first but then joined together in one harmonious dish.
The robust bucatini pasta enveloped in rich and velvety sauce and sprinkled with morsels of crispy garlic and guanciale makes for a memorable culinary experience. Perfect for a romantic meal, its simple elegance creates an intimate atmosphere in which you will savor each bite while enjoying the company of your loved one. For your next date night, think about turning to the classic carbonara for an indulgent and intimate evening.
- Dinner Party – Steak and Potatoesby peapodphoto
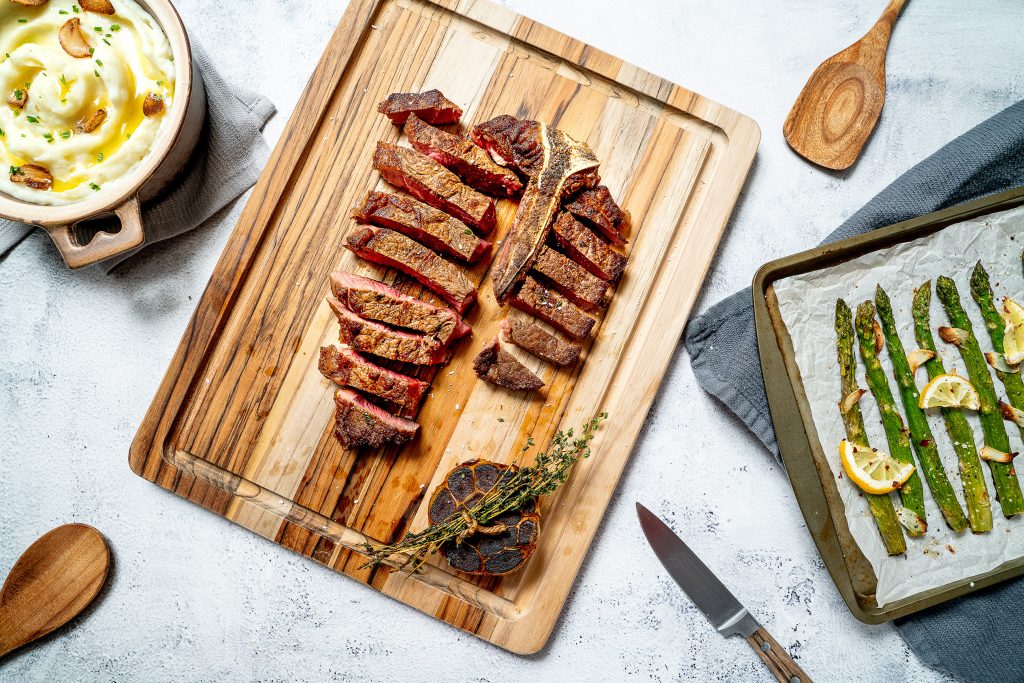
Cooking for company can be a daunting task. There is the urge to make something extravagant, which is usually followed by intense anxiety worrying if you will pull it off or be rushing to the drive-thru in an attempt to save the night. While it is enticing to go for the gold, with a little bit of extra care, you can turn a classic combo into an elevated experience fit for the most discerning palates. Classic pairings are considered as such for a reason. While there are no limits to where we can take our food, sometimes it can be better to stick with what you know when entertaining guests with different tastes.
The undeniably delicious combo of steak and potatoes has been an American staple for years. Add in asparagus and you have a harmonious plate that can stretch from a rustic home cooked meal all the way to the finest dining establishments in the world. Steak is often looked over for gatherings because it usually requires individual preparation but by taking a large cut like the porterhouse we can feed multiple people with just one steak. This delightful trio with its enticing flavors, textures, and aromas can satisfy even the pickiest taste buds. Our dinner party menu features a rich and tender porterhouse steak, garlic mashed potatoes, and oven-roasted asparagus. This classic combo celebrates simple ingredients with complex flavors cooked to perfection.
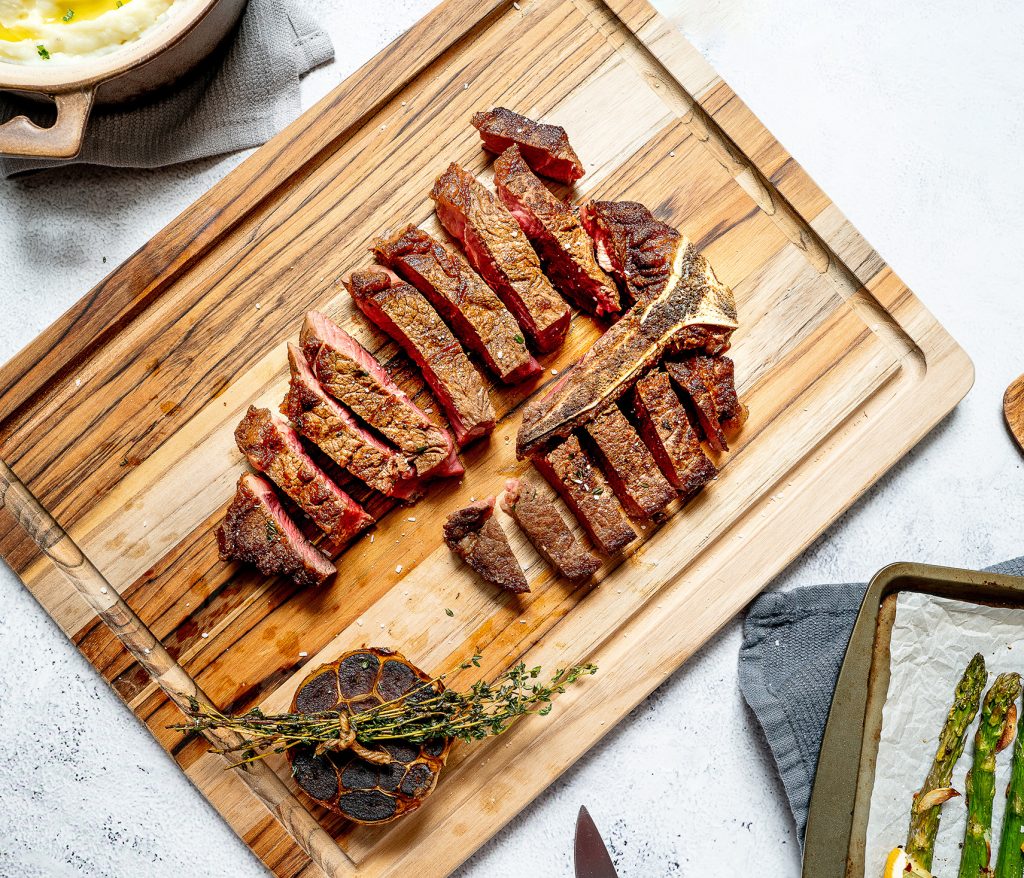
The cut of steak I chose to use for this dish is a porterhouse. Synonymous with indulgence, this regal cut of steak combines the prized tenderloin with the NY strip steak split down the middle by the signature “T-bone.” This prime steak offers the best of both worlds with the buttery tenderness of the tenderloin and the robust marbling of the strip.A distinct bone running through the middle adds a little oomph and depth to the flavor and helps to ensure the tenderloin doesn’t overcook. This is the perfect steak for sharing because of its diversity and generous size (the porterhouse tends to be a larger cut portioned into thick steaks).
I would however like to take the time to talk about another cut of steak. For this recipe I chose the porterhouse for its shareability, but near and dear to my heart always is the ribeye. While the porterhouse is considered by many to be the king, the ribeye stands tall in a world of beef and needs no titles. With its high fat content and marbling, this rich and juicy cut has a pronounced flavor that screams “beef!” A favorite of many steak enthusiasts, the ribeye has an unmatched flavor profile when cooked right. No matter which cut you decide to go with, both the porterhouse and ribeye can be dry-aged for ultimate umami and depth of flavor. While seemingly simple, the complexities of steak offer a wide range of options for culinary exploration.
There are many different ways to cook a steak. Some people will tell you one is right or another is wrong. I believe that no matter how you cook it, a well prepared steak will be delicious. I like to cook my steaks in a cast-iron pan on the stove-top. Basting the steak with a combination of butter, garlic, and thyme not only adds complex flavor but also provides a beautiful caramelized crust (crust means brown not black!). As the butter washes over the steak it infuses the meat with the aromatics transforming it into a masterpiece of flavor.
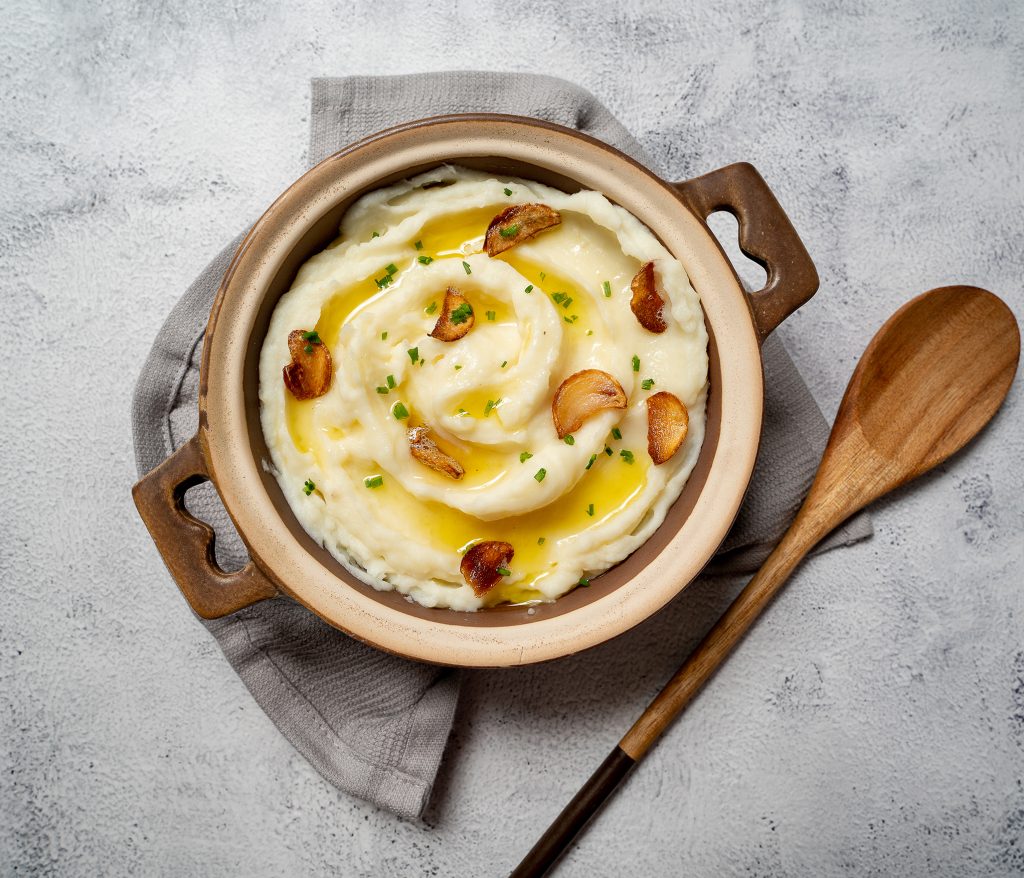
Alongside this steak we find another classic, the mashed potato. First cultivated over 10,000 years ago, the potato can be found in foods all over the world. One of my favorite ways to eat mashed potatoes is with garlic. A flavor icon, garlic adds an aromatic and savory profile to everything it touches. The ability of garlic to elevate the simplest of dishes is unmatched, and in the case of mashed potatoes, it takes an already delicious dish and amplifies it to new heights. The marriage of creamy potatoes with the savorygarlic creates a balance of harmony that excites the palate and leaves a lasting impression. Garlic-infused oil drizzled over the top brings a touch of sophistication and indulgence to an otherwise simple side.
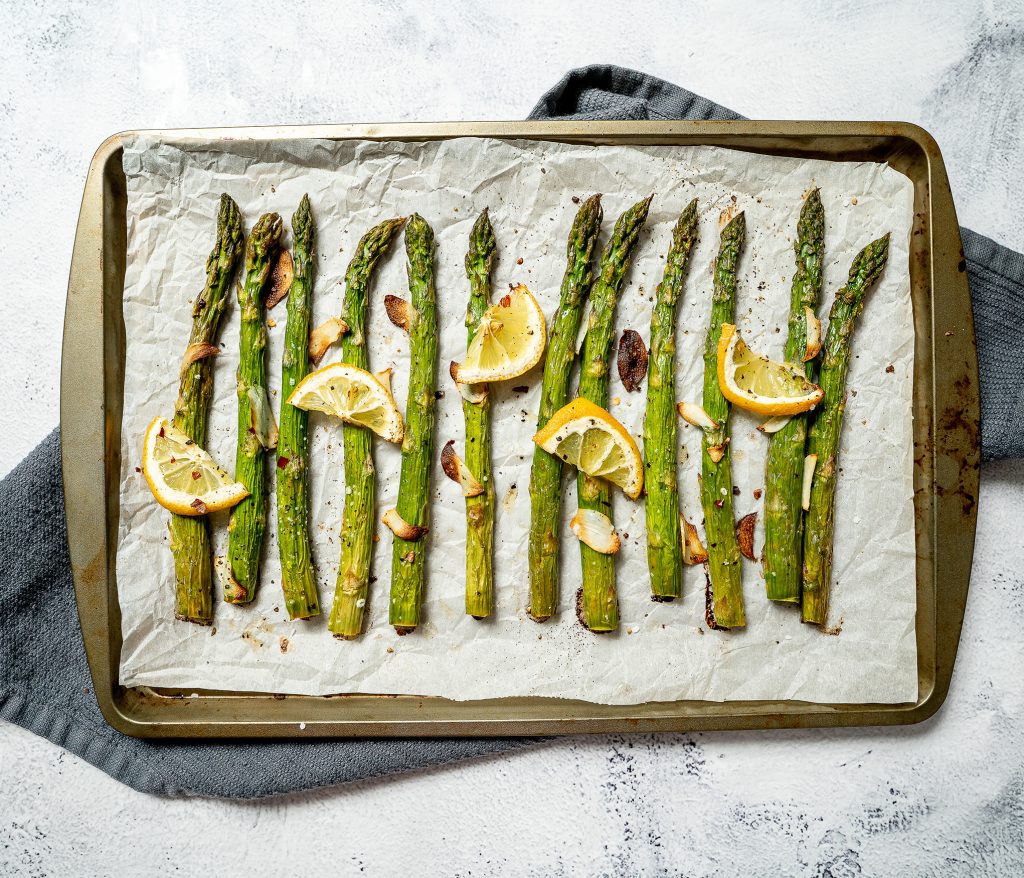
To round out our savory meal, the roasted asparagus strikes a perfect balance of flavors and adds a much needed brightness and texture to the plate. The bright acidity from the lemon coupled with the subtle warmth of the crushed red pepper creates a depth of freshness to the dish that helps cleanse the palate as you indulge in your steak. Roasted just enough to maintain that snap, the crisp asparagus is a welcomed addition.
Steak, asparagus, and potatoes come together in this meal in a delicious balance of flavors, textures, and aromas. This remarkable trio showcases culinary technique as simple ingredients soar to new heights. With a few extra steps you can turn up the flavor of any meal and serve food that will satisfy and impress your guests!
